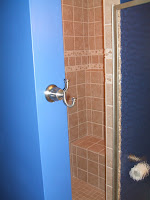
Now, as I said earlier, I have done a few projects but the thing that I have done multiple times is laying ceramic tile. Laying ceramic tile sounds like it requires a lot of expertise and skill but as I did my first project, I was amazed at how simple it really is to do, if you take the time to plan out the project and invest in a few specialized tools. If you want to see the results of a tile project that I worked on for my in-laws, then read on.
 When I remodeled our master bath, we decided that ceramic tile was going to line the walls of the shower. I decided that I would invest in a few tools to make the job easier and also knew that I would use them when it came time to remodel the kitchen.
Little did I realize that I would do several tiling jobs after our shower was finished. These included a tiling project for each of our kids homes and just this past weekend, we tiled the back-splash in the kitchen at my in-laws house. That job went really well for several reasons. First of all, having experience and the tools played a role in how quickly and easy it was to do. Secondly, I had help from my in-laws and my lovely wife and third, even though the tile looks small, it was pre-arranged and attached to a 12" square mesh backing. We completed the back-splash (grout and all) in about 9 hours.


Some of the critical tools that can make the job easier to handle are:
- tile (wet) saw - while a little messy, these really make it easy to cut the tile (believe me, you will have to cut tile). I invested in an inexpensive model that does the job quite well.
- nippers - this little tool is necessary because you will have to chip away small sections or make detailed cuts or any cut that is not straight.
- notched trowel - needed to spread the thinset or adhesive. There are different sizes and the one you need depends on the tile you are laying.
- grout float - a padded (usually with foam or rubber) trowel that you use to spread the grout.
- small screwdriver - they are really useful for cleaning out any adhesive that squeezes out from underneath the tile and into the space between each tile piece. You need that space to be open for the grout to fill it.
- sponges - you need at least two large sponges for cleaning the excess grout off after spreading it.
- Plan the project - take the time to plan out your project. Make a sketch using grid paper to establish any patterns and to make sure you don't overlook any possible issues.
- Get 10% more tile than the square footage you are covering. You will make some cutting mistakes. Even if you don't make too many mistakes, the extra pieces will be useful if you have to replace any broken tile later on.
- Get some help - like any project, the more people helping, the faster it will go. This is especially true during the grouting process!
- When tiling walls and space is limited, spread the adhesive on the tile instead of on the wall. It takes a little longer but then you don't have to worry about getting adhesive on other surfaces.
- Spacing - use tile spacers especially when tiling walls. You just can't win the fight against gravity without these things.
- Protection - any adjacent surface that is not getting tile should be protected with masking tape and/or plastic drop cloths. This is especially smart when tiling walls.

No comments:
Post a Comment